How to rip DVD to Flash?
This document will show you how to convert DVD to flash. After these simple jobs, you can joyfully edit your DVD clips and post it on your Myspace, blog, website and YouTube easily. It will include two parts:
How to convert DVD to flash? How to crop, edit, join and trim DVD movie to flash? Part1. How to convert DVD to flash?
Step1. Please download Aimersoft DVD to FLASH Converter; you can know more about it by visiting here.
Step2. Load DVD file
Then install and run Aimersoft DVD to FLASH Converter. Load your DVD into the program: Please click "Load DVD" button or directly click the “File -> Load DVD folder” in the main interface, then select your DVD-ROM in the pop-up window and press the "OK" button. You also can click “Load File” button to import IFO file from your computer hard disk.
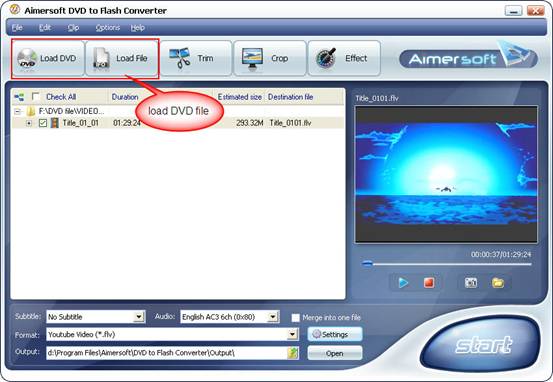
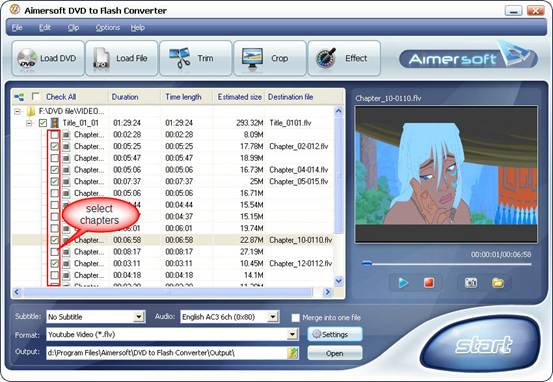
Step3. Select the chapters you want to convert.
You can convert the whole DVD by highlight the title which contains the whole episodes of DVD, such as title 01 in the following screenshot. Or if you like, you can select certain chapters to convert: Press the little button before “Check All” on the interface to find all the chapters in the file.
This software fully support all kinds of DVD, such as regular DVD movie and DVD MTV. DVD MTV will have several titles, so you can select the desire MTV to convert.
Step4. Select the output FLASH Video format, Subtitle and Audio
Format: This software can convert DVD to FLV format. If you want to upload regular video files to these websites: Youtube, Myspace, Yahoo! Video and Google video, just select the proper format according to your need. Subtitle: Regular DVD movie usually has several subtitles, like English, French, German, etc. You can select anyone according to your need. You also can select “No Subtitle” Audio: Select Audio is the same as select Subtitle.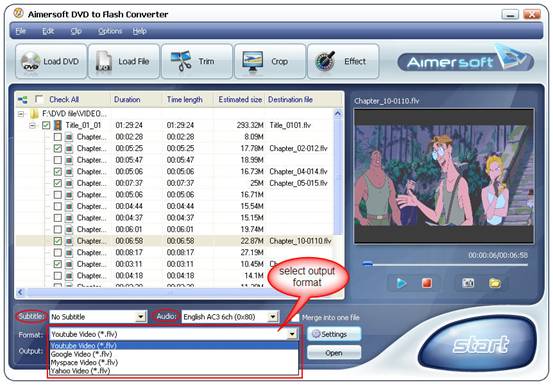
After all things done, click “Start” to start conversion.
Part2. How to crop, edit, join and trim DVD movie to Flash?
If you want to convert DVD without black edges, you can click the “Crop” button, and then you will see a pop up windows (See the figure below). There is a frame in dashed line around the movie video; you can drag it to cut the black edges.
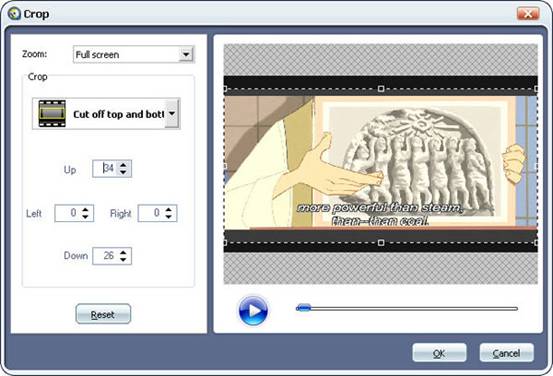
MMoreover, you can click the Crop drop-down list to select a Crop model you prefer, for example: “Cut off top and bottom black edges”. You can even type the number in the box to cut off black border accurately.
If you want to combine several DVD chapters into one file, on the main interface, there is a check box “Merge into one file”, select it, then you will only get one output file instead of several files by chapters.
If you want to snatch pictures from DVD, while you previewing the DVD movie, there will be a small camera icon below the preview window, click it when you want to snatch the picture, it support output picture as JPEG or BMP format.
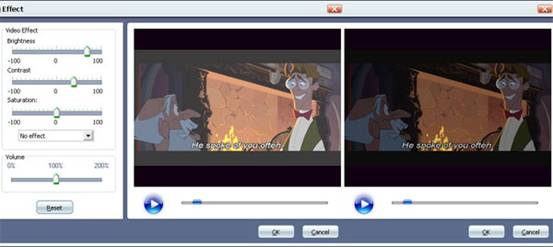
You can click the “Effect” button and customize the brightness, saturation, contrast, volume, etc (See the figure below). You can even apply special effects such as “Emboss”, “Negative”, “Old film” and “Gray” by selecting an effect from drop-down list.
If you just want to convert several DVD chapters, you can just select the chapters you want to convert (you can preview the DVD clip before converting it).
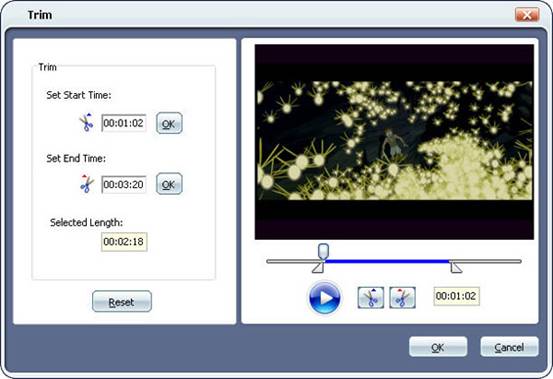
Or you can click “Trim” button to open the trim panel, drag the trim bar to set start time and end time to convert a clip from your movie. You can also type the exact time values in the Set Start Time field and Set End Time field to trim video.
